Improving High Speed Slitting Line Performancewith Simple Maintenance Steps
Simple and regular maintenance helps your high speed slitting line work well. If you check, clean, and lubricate every day, you stop big problems before they happen. Small steps, like tightening wires or checking belts, help a lot. Taking care of the machine early can lower surprise stops by up to 65%. Teaching your team and having spare parts ready keeps things moving. Think of maintenance as a way to make your machine last longer and cut better.
Key Takeaways
· Check, clean, and oil the machine every day to stop breakdowns and help your slitting line work well. – Look at the blades often and take care of them to make sure they stay sharp and cut cleanly. This also helps the blades last longer. – Pick the right blade materials and oils to make the blades stronger and stop the machine from stopping too much. – Teach your team well and use a clear plan for fixing things. This helps you find problems early and keeps everyone safe. – Write down all the work you do on the machine. This helps you see what goes wrong, plan fixes, and keep making good products.
Why Maintenance?
Performance Impact
You want your high speed slitting line to work well every day. Doing regular maintenance helps you reach this goal. When you look after your equipment, each part lasts longer. The quality of each cut gets better too. Clean blades and oiled motors help make smooth, neat slits. You get fewer burrs and flakes. This means you avoid rough edges and do not waste material.
Tip: Check your hydraulic circuits and cutting tools often. Change seals and oil pumps to keep things working well.
Here are some good changes you will see with regular maintenance:
- Machines and parts last longer.
- Cutting quality gets better, with fewer burrs and flakes.
- Motors work better.
- You stop surprise breakdowns.
- You get more done and better slit quality.
You can also make your machine work better by using the right blades and coatings. For example, ceramic or tungsten carbide blades last longer and cut cleaner, even with hard materials. Shiny and coated blades make less dust and chips, so your process is even better.
Downtime Prevention
Downtime wastes your time and money. Simple maintenance steps help you stop these problems. If you follow a routine, you find small issues before they get big. You keep your high speed slitting line running fast.
- Regular preventive maintenance keeps your equipment in good shape.
- You have fewer breakdowns and bad products.
- Smooth running means better control and higher quality.
- Bad maintenance causes more breakdowns and slower work.
You can stop most downtime by checking, cleaning, and oiling your machine every day. Quick checks and small fixes keep your line working and your customers happy.
Blade Care
Inspection
Check your slitting line blades at the start of each shift. This helps you find problems early and keeps cuts clean. Look for chips, dents, cracks, or stuff stuck on the blade. Listen for odd sounds when the machine runs. Strange noises can mean blade trouble. Watch for rust and check if cuts look uneven or have burrs. These signs show the blade needs care.
- Look at blades for chips, dents, cracks, or buildup.
- Listen for weird sounds while the machine is working.
- Check for rust and uneven cuts.
- Write down how the blade looks and works after checking.
- Check holders and shaft to stop uneven pressure.
You should also notice if cutting gets worse, feels harder, or sounds louder. These changes mean the blade needs fixing. Make a plan to check blades based on how much you use the machine, what you cut, and your work schedule. Following the maker’s plan helps you stop downtime and makes blades last longer.
Cleaning
Keeping blades clean is an easy way to make them last. Clean every day to get rid of glue, ink, and other stuff that can cause rust or buildup. Clean blades stay sharp and lined up. This means less work for your machine and better products.
Here are some good cleaning agents and ways to use them:
Cleaning Agent / Method | Usage / Application Details | Corrosion Prevention / Additional Notes |
Rockler Water-based Pitch & Resin Remover | Soak blades for 5+ minutes, scrub gently with brushes or pads | Dry well, use Bostik DriCote lubricant |
Simple Green | Use diluted or strong; soak and scrub; overnight for tough buildup | Rinse and dry; use lube to stop rust |
Soapy Water | Mild cleaner with toothbrush or scrubbing | Rinse and dry to stop rust |
Castrol Super Clean | Mix half and half, use gun bore brush for tough buildup | Dry and lube after cleaning |
ZEP Heavy-Duty Citrus Degreaser | Soak for 15 minutes, scrub with soft brass brush | Dry and lube |
LA’s Totally Awesome All-Purpose Cleaner | Use with scrubbing | Light WD-40 coat for rust protection |
Boiling Water with Baking Soda | Submerge, let cool, scrub with nail brush if needed | Rinse, dry, and lube after cleaning |
WD-40 | Spray, wait, scrub, wipe | Removes rust, protects metal from rust |
Bostik DriCote Aerosol Dry Lubricant | Use after cleaning to lube and protect blades | Stops rust, keeps blade working well |
Cooking Spray (e.g., Pam) | Spray on blades for cleaning and lube | Helps stop rust |
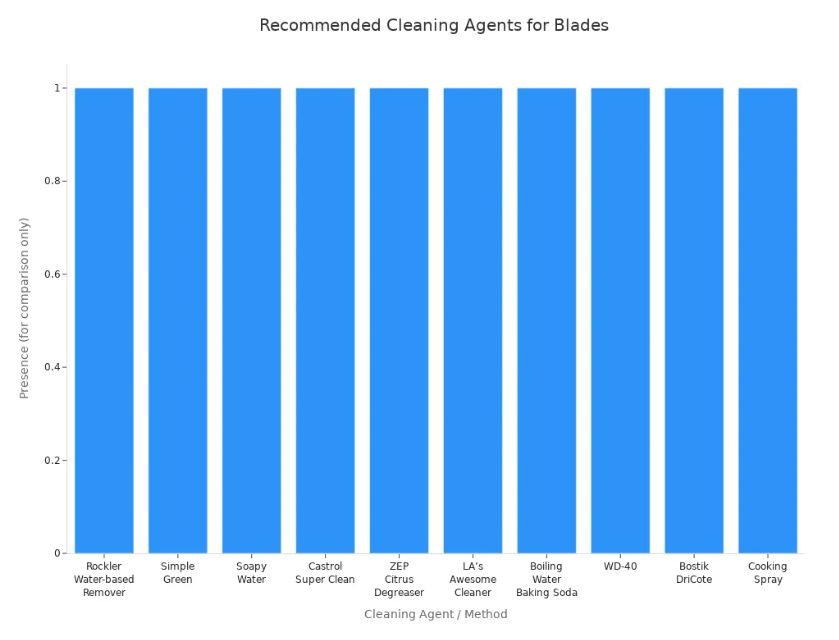
Tip: Always dry blades well after cleaning and use a little lube to stop rust.
Follow this easy cleaning routine: 1. Wipe blades every day. 2. Check for stuff stuck on them. 3. Clean with the right cleaner and scrub gently. 4. Dry and lube before putting blades back.
Check blades each week and month to find bigger problems and keep blades sharp and safe. This helps your machine work better and makes blades last longer.
Sharpening
Sharp blades give you neat, exact cuts and less waste. Sharpen blades based on how much you use them and what you cut. If you use them a lot, sharpen every 40 to 60 hours. For less use, sharpen every 80 to 100 hours. If you cut thick or rough stuff, sharpen more often.
- Check blades often for dullness or damage.
- Clean blades after each job.
- Don’t sharpen too much or you will change the blade size and edge.
Industry rules say bevel angles should be between 10° and 40°, depending on what you cut. Lower angles (10°–20°) are best for thin, soft stuff but wear out faster. Higher angles (25°–40°) last longer and cut tough things like steel. Use a good grinder to make blades sharp and keep the right angle.
Edge Type | Bevel Angle (°) | Typical Applications | Blade Material | Typical Lifespan (days) | Cutting Force Index |
Ultra-sharp | 10–15 | Films, foils, thin textiles | Ceramic, SS420 | 2–3 | Low |
Precision-cut | 16–25 | Paper, packaging, soft foods | Stainless steel | 5–7 | Medium |
Heavy-duty | 26–35 | Rubber, plastics, steel | Tungsten carbide | 10–15 | High |
Note: Sharp blades mean less downtime, better products, and lower costs.
Material Choice
Picking the right blade material changes how often you need to fix or swap blades. Tungsten carbide blades last up to three times longer than high-carbon steel blades. They are very hard and resist wear, so you change blades less and have less downtime. Titanium-coated blades can last up to 50% longer by lowering friction and wear.
Blade Material | Durability & Suitability for High-Speed Slitting | Key Advantages | Limitations |
Tungsten Carbide | Most durable for high-speed cutting of hard materials | Very hard, stays sharp a long time | Brittle, can crack if hit |
High-Speed Steel | Tough, keeps sharpness at high heat | Good toughness, good for fast cutting | Not as tough as carbide, costs more |
Tool Steel | Medium toughness, good for general cutting | Wears well, not expensive | Needs more swaps for hard stuff |
Ceramic | Great wear and rust resistance | Keeps edge very well | Too brittle for heavy hits |
Tungsten carbide is best for fast, busy lines. High-speed steel is good for softer stuff. Tool steel is fine for most jobs but needs more swaps. Ceramic blades don’t rust but break easily if hit.
Tip: Pick your blade material based on what and how thick you cut. This helps you get the best results and longest blade life.
Lubrication
Points to Lubricate
You need to focus on the right spots when you lubricate your high speed slitting line. Proper lubrication keeps your machine running smoothly and stops parts from wearing out too soon. If you skip or miss these points, you risk breakdowns and poor cut quality.
Here are the most important places to lubricate:
- Bearings and Bearing Parts
Bearings help your machine move with less friction. You should lubricate them often to prevent wear and keep everything turning smoothly. - Sliding Table Screw Nuts
These parts move back and forth during cutting. Consistent lubrication stops them from grinding and wearing down. - Uncoiler and Rewinder Reels
The hydraulic cylinders and rotary joints here need regular checks. Inspect and lubricate these every 600 to 1,000 hours to avoid sticking or leaks. - Hydraulic Cylinders
If you use these cylinders a lot, check and lubricate them every 1,000 hours. For less frequent use, every 2,000 hours works. - Solenoid Valves
These control oil flow. Check seals every 1,000 hours and grease them before you install new ones. - Hydraulic Lines and Tubing
Inspect these every 2,000 hours. Lubrication and cleanliness here prevent leaks and keep oil flowing right. - Pumps
Lubricate and clean pump bearings every 2,000 hours. This keeps pressure steady and avoids sudden failures.
Tip: Always use lubricants made for high-speed machines. Synthetic greases with low viscosity and special additives work best for bearings and spindles. Look for products like BRB-575 or SAM-2020, which handle high speeds and temperatures well.
Choosing the right lubricant matters. For high-speed bearings, pick a grease with a low viscosity base oil. This reduces heat and drag. Use lithium or polyurea thickeners for better pump-ability. Make sure the grease can handle your machine’s top temperature. If you use the wrong lubricant or skip lubrication, you will see more friction, rolling marks, and even tool damage. Cleanliness is just as important. Dirt or grit in the system can cause misalignment and surface damage.
Schedule
You need a clear schedule to keep your slitting line in top shape. Regular lubrication stops friction and wear before they start. Follow a routine based on how much you use your machine and the maker’s advice.
Here is a simple table to guide your routine:
Maintenance Task | Monthly Maintenance | Semi-Annual Maintenance |
Lubrication of Moving Parts | Lubricate rollers, gears, bearings, and chains with the right lubricant. Check for odd noises or friction. | Reapply lubricants thoroughly. Inspect all moving parts for wear and make sure lubrication is enough. |
Chains & Belts | Lubricate chains. Check chain sag (should be about 2% of sprocket distance). Inspect belt tension and wear. | Measure chain length and replace if it has stretched by 1.5%. Check tension and wear. Replace worn belts. |
Gearbox Maintenance | Check oil level. Look for leaks or strange noises. Make sure the vent system works. | Change gearbox oil after 300 hours of use, then every 2,000 hours. Inspect inside parts for wear. |
You should also:
- Check oil levels in hydraulic systems every month.
- Replace hydraulic oil if it looks dirty or smells burnt.
- Clean or change filters to keep oil clean.
- Grease seals and moving joints before they show signs of wear.
Note: Frequent re-lubrication is key for high-speed bearings. This keeps your machine running fast and smooth, and helps you avoid sudden breakdowns.
If you stick to this schedule, you will see fewer breakdowns and better cut quality. Your machine will last longer, and you will spend less on repairs. Regular lubrication is a simple step that pays off every day.
Coil Handling
Loading Techniques
You need to load coils safely and efficiently to keep your slitting line running at top speed. Good loading practices protect both your equipment and your team. Follow these steps to improve your coil loading process:
- Gather all coil data before you start. Know the coil’s weight, size, and material type. This helps you plan the layout and avoid mistakes.
- Install your equipment with enough space for free movement. Make sure you can adjust and maintain all parts easily.
- Use coil loading cars or double spindle stock reels. These tools help you load coils faster and reduce downtime.
- Train your team to center coils on the mandrel and expand it properly. Proper training lowers the risk of accidents and misalignment.
- Use hold-down arms or cradles for springy or delicate materials. These supports keep the coil tight and prevent it from loosening during feeding.
- Set up loop control devices, such as rider arms or electric eyes. These tools help you manage slack and keep the material moving smoothly.
- Protect coils from damage. Use cushioned supports and smooth rolls. Avoid sharp edges that can scratch or dent the coil.
- Maintain your coil handling system. Regularly check pressure, alignment, and safety features. Fix any issues right away.
Tip: Use entry coil storage systems like turnstiles or saddles to stage multiple coils. This reduces downtime and lets you choose coils quickly.
Tension Control
Proper tension control is key to producing high-quality slit material. You must keep the web tension steady from the start to the end of the process. If you set the right tension, you avoid many common problems:
- You prevent wrinkles, breaks, and uneven edges in your material.
- You keep the slit edges clean and the widths correct, especially with thin or stretchy materials.
- You avoid crushing the core or blocking the roll during rewinding by lowering tension as the roll grows.
- You reduce defects like telescoping rolls and roll blocking by using features such as Taper Tension.
- You ensure smooth material flow and even winding by combining precise tension control with proper roller alignment.
Note: Always check your tension settings and adjust them for each material type. Good tension control means fewer defects and better finished products.
Alignment & Calibration
Blade Alignment
You should check blade alignment often to keep things working well. Good blade alignment helps you get sharp, clean cuts. If blades are not lined up, you get rough edges and the blades wear out faster. You might also hear loud noises or feel shaking when the machine runs. These problems mean you need to fix the blades right away.
- Check blade alignment before every shift starts.
- Watch for rough cuts, burrs, or strange sounds.
- Make sure blades are straight and press down evenly.
- Move blades back in place if you see shaking or bad cuts.
- Write down each time you check or fix the blades.
Tip: Lining up blades often makes them last longer and helps your products look better. You save money and stop the machine from breaking down by finding problems early.
Teach your team how to spot blades that are not lined up. Fixing these problems fast keeps your slitting line safe and working well.
Equipment Calibration
You need to calibrate your slitting line equipment to make sure your cuts are right. Calibration means checking and fixing your machine’s settings so everything works as it should. If you skip calibration, your cuts might be the wrong thickness and your products may not be good.
Experts say you should calibrate your tools every three to six months. If you use your machine a lot or run it fast, you might need to calibrate more often. Always follow the maker’s rules for your machine. Check if your measurements stay the same and change your schedule if you see problems.
- Make a plan to calibrate based on how much you use the machine and where it is.
- Use the right tools to check thickness, tension, and where the blades are.
- Write down each calibration and any changes you make.
- Look for mistakes or changes between calibrations.
Calibrating your machine often keeps your slitting line working well and making good products. You avoid big mistakes and save money.
Cleaning & Safety
Debris Removal
You need to keep your slitting line free from debris to maintain high performance and safety. Debris can cause jams, dull blades, and even damage your equipment. Removing waste quickly and efficiently helps you avoid these problems and keeps your line running smoothly.
Here are some of the most effective debris removal methods:
Method | Description | Example Uses |
Standard air eject | Uses forced air to blow debris out of small dies; simple and low-cost. | Removing chad holes in small labels or tags |
Pulse air ejection | Delivers bursts of air to clear larger parts; works well at high speeds and lowers air pressure needed. | Blister cards, tags, hanger tabs, folding cartons with holes |
Vacuum transfer | Holds and moves slugs using vacuum; allows precise removal and collection. | Similar to pulse air ejection but with more control |
Stripping pin removal | Uses pins and a comb to mechanically remove scrap; needs minor press changes. | Circles as small as 5/16-in., windows up to 2-in.+, carton hanger holes |
Feed/vacuum thru | Pulls waste through the die center using suction; best for thin or adhesive-free materials. | Small diecut waste removal from web, especially thin or non-adhesive materials |
Tip: Choose the debris removal method that matches your material and production speed. Regularly check for buildup around blades and rollers to prevent jams.
Oil Leaks
Oil leaks can lead to serious equipment failures if you do not catch them early. You should inspect your slitting line for leaks every shift. Even a small leak, like one drop per second, can drain a gallon of oil in less than a day. This loss can starve your machine of lubricant and cause major breakdowns.
Follow these steps to manage oil leaks:
- Spot leaks early and find their sources. Quick action stops problems from getting worse.
- Check how bad the leak is. Look at the rate, volume lost, and type of fluid.
- Investigate the leak point. Fix the root cause, such as worn seals or stressed parts.
- Take action right away. Use temporary fixes or shut down the line if needed to prevent damage.
- After repairs, analyze the cause. Oil sampling and part checks help prevent future leaks.
- Leaks can let dirt and water into your system, which may trigger more failures.
- Lost oil reduces machine efficiency and can damage your products.
- Uncontained leaks create safety and environmental hazards.
Note: Routine inspections and fast leak repairs keep your workplace cleaner and safer. You protect your equipment and avoid costly downtime by staying alert to leaks.
Operator Training
Skill Development
You play a key role in keeping your high speed slitting line running at its best. Strong operator skills help you avoid mistakes and keep production smooth. The best training programs focus on both the basics and the details of the slitting process. You should learn how to set up the machine, adjust line speed, and control tension. Training also covers how to use automated systems and how to spot problems early.
Here are the most effective ways to build your skills:
- Standardize process parameters like speed and tension for every job.
- Learn proper setup and safe operating steps for your machine.
- Practice using automated controls while staying alert for errors.
- Take part in training that explains every part of the slitting process.
- Work in a team that values improvement and careful work.
You need to know how to handle new high-speed lines, which work differently from older machines. Training should include quick-change slitter head setup, preventive maintenance, and daily operations. Maintenance staff should also learn more than just emergency repairs. When you keep learning and your team stays well-trained, your slitting line runs faster and with fewer problems.
Tip: Regular training keeps your skills sharp and helps your company stay ahead of the competition.
Routine Checks
Daily checks help you catch small issues before they become big problems. You should inspect each part of the slitting line before every shift. Use a checklist to make sure you do not miss anything. Look for signs of wear, loose bolts, or misaligned parts. Replace dull blades and adjust tension devices to keep the process stable.
- Inspect the cutting blade for wear or damage.
- Clean the blade, rollers, and work surfaces to remove dust and residue.
- Check for loose screws, bolts, and fittings; tighten them as needed.
- Look at cables, connectors, and sensors for damage or misalignment.
- Make sure sensors are secure and free from obstructions.
Quick repairs and regular cleaning keep your machine in top shape. When you follow these steps, you protect your equipment and ensure high-quality cuts every time.
Note: Consistent routine checks help you avoid downtime and keep your slitting line reliable.

Troubleshooting High Speed Slitting Line
Common Issues
You might run into different problems when using a high speed slitting line. Knowing about these problems helps you fix them quickly and keep things working.
- Tension problems can make cuts rough or uneven. Bad tension can also stretch or break the material.
- If setup takes too long, your work slows down. Making changes by hand takes more time and can cause mistakes.
- Emergency stops can stop your machine for a long time. If you do not act fast, the machine could get damaged.
- If operators do not know enough, they might make mistakes. This is a bigger problem with older machines.
- If the bearings in the slitter head wear out, cuts will not be as good.
- If edge trim is not controlled, you will waste more material. 7. Old control systems can break more often. They also make it harder to find and fix problems.
- If parts are loose or not lined up, the machine can shake. This can make cuts worse and wear out parts faster.
- Electrical problems, like tripped breakers or bad motors, can stop your line suddenly. 10. If you use the wrong oil or forget to add lube, parts can get too hot and break.
Tip: Check your machine often and fix problems fast. This helps you avoid most issues with your high speed slitting line.
Quick Fixes
You can fix many problems with easy steps. Try these quick fixes to keep your high speed slitting line working well:
- If cuts look uneven, check if the blade is sharp. Change or sharpen dull blades right away. Make sure the knife clearance matches the sheet thickness, usually between 6% and 16%.
- If the material gets stuck, look at the feed rollers. Clean or change rollers that are dirty or worn out.
- If rolls are loose or look strange, check the tension and line up the winding shafts. Make sure the core is tight so it does not move.
- If you hear weird sounds or feel shaking, check for loose bolts or parts that are not lined up. Tighten and fix them as needed.
- For lube problems, check oil and grease every day. Clean off old lube and fix leaks to stop overheating.
- If you have electrical problems, look at the breakers and control panels. Change broken parts and make sure the power is steady.
- Always write down problems and repairs. Teach your team to find and fix small problems before they get worse.
Note: Fixing problems fast and doing regular checks keeps your high speed slitting line running well and helps you avoid big breakdowns.
Maintenance Routine
Checklist
You need a clear checklist to keep your high speed slitting line working well. A checklist helps you find problems early and keeps everyone safe. Use these steps every day and during planned maintenance:
- Listen and look for strange noises or shaking in the machine. If you notice anything weird, stop and check right away.
- Clean up the work area and pick up all scrap metal, tools, and trash. Keeping things clean helps stop accidents and keeps the line running fast.
- Put lubricant on moving parts like bearings, gears, and guides. Always use the right kind of lubricant.
- Check the belts and chains for tightness. Tighten bolts and nuts if they are loose.
- Watch the slitter knives. If they look dull or have burrs, sharpen or change them.
- Make sure tension control sensors are set right. This keeps the material tight and steady.
- Look at hydraulic and pneumatic parts for leaks, pressure drops, or old hoses.
- Check wires and insulation. Clean motors and transformers so they do not get too hot.
- Always use lock-out/tag-out steps before you start maintenance. This keeps you safe from the machine turning on by accident.
- Change out old parts with real manufacturer parts.
- Keep a first-aid kit close and make sure someone trained is nearby.
- Go over your emergency plan and practice drills with your team.
Tip: Teach all operators these steps. A trained team can find and fix problems faster.
Here is a quick table for when to do key maintenance:
Component | Maintenance Task | Interval (hours) |
Hydraulic cylinders | Check how they work and look | |
Hydraulic & pneumatic parts | Check pressure, wires, flow sensors, and lube devices | 1,800 – 2,000 |
Separators & cutting tools | Look for knife scratches and burrs | 1,000 |
Hydraulic clamping devices | Check clamping strength | 2,000 |
Eccentric clearance devices | Check adjustment | 2,000 |
Electric motor | Clean filters, lube shaft bearings, change seals | 2,000 |
Documentation
You should write down every maintenance job you do. Good records help you remember what you fixed and spot patterns in how the machine works. Use a logbook or computer to record:
- Date and time of each check or repair
- Parts you checked, cleaned, or changed
- What lubricant you used and where
- Results from calibration or adjustments
- Any problems you found and how you fixed them
- Names of people who did the work
Note: Keeping good records helps you plan future maintenance and shows you followed safety rules. It also makes it easier to solve problems and share info with your team.
When you follow a strong routine and keep good records, you protect your equipment and make better products. This helps you avoid costly stops and keeps your slitting line working every day.
You can make your high speed slitting line work better by doing simple, regular maintenance. Taking care of your machine often helps it last longer, work better, and saves you money. The table below shows how checking your machine often helps you in the long run:
Task | Benefit |
Stops the motor from getting too hot and helps it last longer | |
Shaft bearing lubrication | Lowers damage and makes the machine more reliable |
Knife and separator inspection | Keeps cuts neat and smooth, with fewer rough edges |
Doing maintenance before problems start keeps your line safe and running well. Begin now and always put maintenance first.
FAQ
How often should you inspect slitting line blades?
You should inspect blades at the start of every shift. Look for chips, cracks, or dull edges. Early checks help you catch problems before they affect cut quality or cause downtime.
What is the best way to prevent material jams?
Keep the machine clean and remove debris daily. Check rollers and guides for buildup. Adjust tension settings for each material. Clean equipment and proper tension control help you avoid most jams.
Why does your slitting line make uneven cuts?
Uneven cuts often mean dull blades or poor alignment. Check blade sharpness and alignment first. Adjust knife clearance to match material thickness. Regular calibration also helps keep cuts straight.
How do you know when to lubricate moving parts?
Follow the maintenance schedule in your manual. Listen for squeaks or grinding sounds. If you see dry spots or feel extra heat, add lubricant right away.
What records should you keep for maintenance?
Keep a log with these details:
- Date and time of each check
- Parts inspected or replaced
- Lubricants used
- Calibration results
- Problems found and actions taken
Good records help you track issues and plan future maintenance.